Semester 2, Week 4: Creating a Triptych in Pixlr
I gotta do WHAT?
For this week's assignment, you have to create a triptych in the online photo editor Pixlr. This tutorial will hopefully make the process as painless as possible.
If you follow this tutorial and still need help, go to lab and ask one of the lab teachers to help you.
STEP 1: Go to www.pixlr.com and click on "Pixlr express (Efficient)".
.
.
. STEP 2: Click "Collage".
.
.
. STEP 3: Click "Layout".
.
.
.
STEP 4: Click the square with the three boxes in it.
.
.
. STEP 5: Move your mouse over each box and click on the + button that appears. Open the picture that you want to use. You will need to save your pictures onto your computer in order to do this! .
.
. STEP 6: Play with the sliders for Spacing, Roundness, and Proportion to fit your photos. (Note: Steps 6 and 7 can be done in either order.) DO NOT change the color of the borders between and around the pictures--they must stay white!
.
.
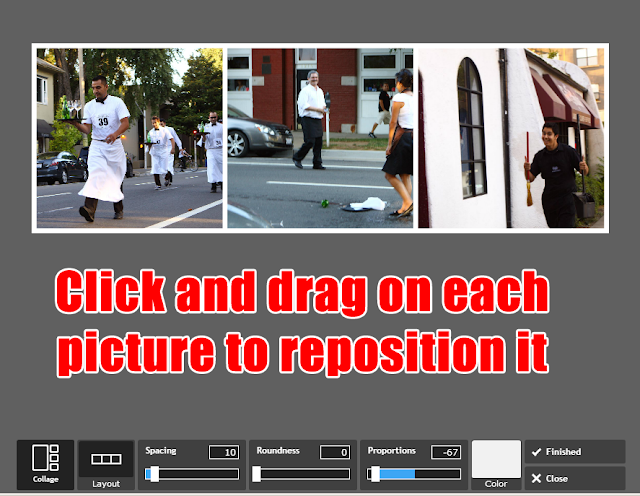
. STEP 7: Click and drag each picture to move it around in its box. (Note: Steps 6 and 7 can be done in either order.)
.
.
.STEP 8: To edit a picture, hover your mouse over the picture you want to edit and click on the paintbrush icon.
..
.
STEP 9: Click on the Adjustment menu to crop your photo or change other things about it.
.
.
.
STEP 10: FIRST click "Apply" to keep any changes you made. AFTER you click Apply, click "Save."
.
.
STEP 11: When you are done editing your triptych, click "Finished".
.
. .
STEP 12: When you are happy with how your triptych looks, click "Save".
.
.
.Congratulations--you should now have a completed triptych! Save it to your computer and email it to your teacher along with your writeup (see your homework assignment for the writeup.)
Use these to answer the HOMEWORK QUESTIONS
 |
| Triptych #1 |
.
.  |
| Triptych #2 |
.
.  |
| Triptych #3 |


